Blog

Pumpkin Mousse!

Halloween is right around the corner and it is one of my absolute favorite holidays! I attend a multitude of parties, potlucks, and functions during this time of year, I always have such a fabulous time. At a majority of these gatherings, food is usually present, therefore, I am usually present.  One of my favorite things to bring to these parties is this Pumpkin Mousse, it’s so easy to make and the best part is, you can make it a day or two ahead of time.

Another great thing about this dessert is that it is fairly inexpensive to make. You can serve it in individual dishes, wine glasses, or just a big bowl.  Anyway,  let jump right on into this delicious recipe…

Ingredients: 

1 15oz can 100% pumpkin puree (NOT Pumpkin pie filling)

1 1/2 cups heavy cream

1/3 cup sugar

1/4 cup honey

2 Tablespoons sweetened condensed milk

2 1/2 teaspoon pumpkin spice (more if ya feelin’ freaky)

2 teaspoons vanilla extract

1/8 teaspoon salt

Instructions:

Add the pumpkin puree, 1/2 cup heavy cream, sugar, honey, salt, sweetened condensed milk, vanilla, and pumpkin spice to a medium saucepan.

20171025_230956

Whisk all the ingredients together until well combined.

20171025_231248.jpg

Next, we need to bring this mixture up to a simmer.  Light some candles and attempt to summon the flames of hell, if you can’t, that’s fine…. your stove top will do.  Let the mixture simmer, stirring frequently, for 5-6 minutes or until ALL sugar is dissolved.

Now transfer the mixture to a bowl and let it cool on the counter.

20171025_232438.jpg

Once it has cooled down, cover it with plastic wrap and put it in the refrigerator to chill completely.

While that’s in the refrigerator chillin’, take your cup of heavy cream and add it to a mixing bowl and whisk it until stiff peaks form, BOOM… YOU GOT WHIPPED CREAM!

Once your mixture is completely chilled, pull it out of the fridge and add the whipped cream to the bowl.

20171026_044619

Take a spatula and fold the whipped cream into the pumpkin mixture. Once you are sure the whipped cream is mixed in completely (the mixture should all be one uniform color), you can add it to whatever dishes you want to serve it in. I put mine in ramekins, wine glasses, and martini glasses. Once your containers are filled cover them with plastic wrap and chill in the refrigerator overnight.  This allows the mixture to come together and firm up.  After that…. you’re done! You just need to add your toppings of choice or no toppings at all!

20171026_182947
I added chopped walnuts to the wine glass and did a chocolate spider web effect to ramekin. 

You could dust the tops with cocoa powder or a little more pumpkin spice… your options for toppings are endless.

This is such and easy and delicious dessert.  It has a wonderful pumpkin flavor and the spice isn’t overwhelming at all.  It’s such a decadent and beautiful dessert that is perfect for parties, potlucks, or just a tasty treat after dinner.  Everyone I know just loves it and I’m sure you will too! Don’t forget to tell your friends that it took you hours to make and that they are lucky to have such an awesome person like you in their lives!

I hope you give this recipe a try ass let me know how it turns out in the comments below!  I hope all of you have a fun and safe Halloween!  Don’t forget to check us out on Facebook (@isbutteracarbblog) and give us a ‘like’! Until next time my little ghouls and goblins, Ciao!

Pumpkin Crumb Cake!

Happy Fall y’all! It is absolutely gorgeous in the Appalachian Mountains right now!  The colors are so beautiful and vibrant, I’m going to try to go out and snap some pictures this week…. hopefully!

Anyway, when I think of Fall the first thing that comes to mind is pumpkins!  I love pumpkins, they are so versatile, you can cook with them, decorate with them, bake with them, use them as lanterns to ward off demons during the month of October, just a whole lot you can do with them! However, today we are making a crumb cake with them.  Some people call it a coffee cake, I call it a crumb cake, you can call it whatever you want! The one thing you will certainly call it is delicious!

It’s such a simple and easy cake to make, the hardest part about making it is trying to stop yourself from eating all of the crumb topping!

I used canned 100% pure pumpkin puree in mine, if you want to get a pumpkin, roast it, and puree it, you go right ahead. I also used pumpkin pie spice in my recipe, but you could certainly make your own (I’ll post a recipe for that here as well). 

Let’s make this cake!

Ingredients: 

Crumb Topping: 

1/2 cup brown sugar

1/4 cup cold unsalted butter, diced

3/4 cup all-purpose flour

1 tablespoon maple syrup

1/4 cup walnuts, chopped

1/8 teaspoon nutmeg

Pinch of salt

Cake: 

1 cup all-purpose flour

1/2 cup brown sugar

1/4 cup 100% pumpkin puree (NOT PUMPKIN PIE FILLING)

1/4 cup unsalted butter, softened

2 eggs

1 teaspoon baking powder

1/4 cup milk

1 1/4 teaspoon pumpkin spice

1/2 teaspoon salt

Instructions: 

(Pumpkin Spice blend – 1/4 teaspoon each of ground nutmeg, cinnamon, allspice, clove, and ginger.)

Preheat oven to 325°F.

Add all of your crumb ingredients to a bowl.

20171007_194949.jpg

Mix those together using a spoon or your hands until it becomes a nice crumbly texture. Like this….

20171007_195909.jpg

Now just put that mixture in the refrigerator and let it hang out while we make the batter.

Grab a mixing bowl or the bowl of the stand mixer if you’re lazy like me, add in your softened butter and brown sugar.  Whisk the butter and sugar together until it’s extremely well combined. It will take you a few minutes.

20171007_200606.jpg

Add in both eggs and mix thoroughly. Next add in your pumpkin and whisk until combined. Add in the flour, salt, baking powder, pumpkin spice, and milk, mix until it becomes very smooth.

20171007_202141.jpg

Now you need to butter up a bread pan. Don’t be shy with the butter, use it liberally. Add in the cake batter.

20171007_202354.jpg

Now grab the crumble out of the fridge and sprinkle it on top of the batter.  Again, don’t be shy with the topping.

20171007_202511.jpg

Pop that little sucker in your 325 °F oven for about 45 minutes.

When it comes out let it cool for about 30 minutes, take a butter knife and go around the edges of the cake to loosen the cake from the pan.

Now just slice it up however you want and enjoy!

20171008_233821.jpg

I like to enjoy my pumpkin crumb cake with a nice hot cup of coffee, I suggest you do the same!  I just live for this cake, the pumpkin really stands out and the spice is just right, it isn’t overwhelming.  All that plus the TOPPING, honey this topping is everything! That hint of maple flavor with the spice from the nutmeg and the crunch of the walnuts just takes this entire thing over the top!

I hope you give this Pumpkin Crumb Cake recipe a try, if you do let me know how it turns out!  Post your pictures to Facebook, Instagram, and Twitter using #isbutteracarb and check us out on Facebook (@isbutteracarbblog)!  Don’t forget to share this post and tell your friends! Thanks for stopping in and until next time, Ciao!

Little Chicago Chili!

Welcome back!  It’s the beginning of Fall here in the Appalachian mountains and that means it’s time for some warm comfort food!  Fall is my favorite season of the year, the mountain air has a crisp freshness to it that you just don’t get the rest of the year.  Plus, it doesn’t hurt that the leaves change into such a beautiful vibrant array of different colors.  I’ve been all over the world, but I can honestly say there’s nowhere else I’d rather be this time of year than right here, tucked away in these majestic mountains.

Anyway, I bet you’re wondering about the name of this recipe, aren’t ya? Well, Is Butter A Carb’s international headquarters is based in Johnson City, Tennessee, which is also lovingly referred to as “Little Chicago”.

Johnson City was a railroad hub and crossroads in the heart of the Appalachian mountains, it had quite the reputation for gambling and bootlegging.  Johnson City was the halfway point (approximately) between Chicago and Miami, it was the ideal location for underground alcohol smuggling and production, notorious gangster Al Capone took full advantage of that.

20170926_203910
Al Capone

Al Capone used Johnson City as a hideout during the prohibition, the Montrose Court Apartment complex (located in the historic Tree Streets District) was the headquarters for his operations. There is said to be secret passages that lead to former speakeasies, underground tunnels, and escape routes used by Capone and other organized crime figures.  I guess you can see why Johnson City was dubbed “Little Chicago”.

20170926_203840
Montrose Court Apartments

Now that you know about the name, let’s get to cooking this delicious chili!

Ingredients: 

1 lb ground beef

1 lb sirloin, cubed (if you want to just use 2 lbs of ground beef…DO IT!)

1 tablespoon all-purpose flour

1 tablespoon vegetable oil

1 onion, diced

3 cloves garlic, minced

1 cup green pepper, diced (I used poblano and green bell pepper)

2 (12 oz) cans pinto beans, drained and rinsed well

1 can crushed tomatoes

2 teaspoons salt

3 tablespoons ancho chile powder

1 tablespoon ground cumin

1 teaspoon ground black pepper

1 teaspoon paprika

1 teaspoon cocoa powder, unsweetened

1/4 teaspoon dried oregano

1/4 teaspoon cayenne pepper

1/8 teaspoon ground cinnamon

2 cups water

12.1oz of beer (12.1oz for the chili…11.9oz for you to drink while you make the chili)


Instructions: 

Place a heavy pot or dutch oven over high heat. Take your cubed sirloin and coat it in the flour, it helps the beef brown up nicely!  Add the tablespoon of oil to the pot and brown your beef.

20170920_200332.jpg

Once the cubed beef is nicely browned remove it from the pot and set it aside.

Now add the diced onion, ground beef, and salt to the pot. Take a wooden spoon and break the ground beef up into little pieces as it browns.

20170920_201540.jpg

It’s going to release quite a bit of liquid and usually we would drain it but we don’t want to do that this time.   Just keep stirring until the liquid has evaporated, it should take about 5 minutes.  Grab your spices!

20170920_195333.jpg

Reduce the heat to medium-high and add in your garlic, black pepper, cinnamon, paprika, cumin, chili powder, and oregano. Add your cubed beef and any accumulated juices into the pot.

20170920_202520.jpg

Stir all those spices in and make sure they are well combined.  You wanna cook the spice and beef mixture for about 4 minutes or until it starts to darken. We want to wake those spices up!

Now let’s stir in the beer!

20170920_202837.jpg

It’s going to get really dark, but don’t worry you’re doing great!  Once the beer is stirred in, add your cayenne pepper, cocoa powder, crushed tomatoes, and water.

20170920_203222.jpg

Bring it to a simmer, reduce the heat to medium-low and simmer for 35 minutes.

Now, stir in your green peppers!

20170920_211646.jpg

You can use any kinda green pepper you want…. Poblano, green bell, anaheim, jalapeno…. It’s up to you,  that’s YOU cookin’!

Lets add in the pinto beans!

20170920_211719.jpg

If the consistency gets to thick just add in a little more water.  Make sure everything is mixed together and bring back to a simmer. Let that baby simmer for 30 more minutes to let the peppers soften and the flavors to come together.

20170920_211901.jpg

You’re going to see some fat start to accumulate on the surface. You want to skim the fat off, trust me, you and your cardiologist can thank me later.  Once the 30 minute simmer is up, the fat is skimmed from the top, you’ve given it one last stir and tasted for seasoning…..

You’re done and you have one fabulous pot of chili ready to serve! Just grab some sour cream, a block of cheddar cheese, and some crackers and you’re ready to indulge!

20170920_222022.jpg
Please don’t use pre-shredded cheese… grate your own, it’s worth it.  I hope to Make America Grate Again! No…. but seriously….. stop buying that crap. 

Beef, beans, and beer what mire could you want? It’s what Al Capone would have eaten…. probably… maybe….i don’t really know.  The point is, you are going to absolutely love this chili, it has such a deep richness to it that you just can’t find in other, lesser, chili recipes.

I really hope you guys give this recipe a try, because it really is super delicious!  Let me know in the comments how it turned out!  Don’t forget to check us out on Facebook (@isbutteracarbblog) for other content I don’t post here. Thanks for stopping by and keep an eye out for more Fall recipes soon!  Until next time, Ciao!

Saffron “Rice”!

How’s it going? Things are busy as always around here.  Tikki took a little trip to the vet for his annual checkup and it went great! We had a massive water leak here at the compound, but thankfully it’s all fixed!

20170826_012248
Look how handsome he is! 

So, as most of you know (since you follow my blog) I’m on a low carb diet and being on a low carb diet there are things I really miss….. like rice!  So I have been making different kids of cauliflower “rice” and this Saffron infused one is my absolute favorite!  Plus, if you want to eat rice, you can make this dish pretty much the exact same way, just replace the cauliflower with cooked rice!  How awesome is that!? Welcome to 2017 people!  Big things are happening over here! Anyway, enough of my ramblings, let’s dive into this recipe!

Ingredients:

1 head of cauliflower, riced

1/2 yellow onion, diced

1 tsp saffron threads

4 cloves of garlic, minced

3 tablespoons chicken broth/stock

1 tablespoon butter

Salt and Pepper to taste


Instructions: 

Ok, first we need to “rice” the cauliflower.  You can buy cauliflower that’s already riced (about 7-8 cups) or just cut the cauliflower up into manageable pieces and put it in a food processor.  Hit the pulse button until it resembles the size of rice.  You will need to scrape down the sides of the food processor at least once, just to make sure everything is getting thoroughly processed.  I didn’t take pictures of me processing the cauliflower to save some on production costs (I forgot to do it).

Now take your saffron threads, mix them in you warm chicken stock/broth and set aside. 20170525_215523

Next melt your butter on medium heat in a large pan.

20170525_223524

Once the butter is melted and foamy, add in the diced onions. You want to cook those onions until they are soft and translucent, about 5-6 minutes.

20170525_223610

Once the onions are cooked add in your minced garlic and continuously stir.  Cook the garlic for about 1 minute, we don’t want it to burn.  When that minute is up add in the riced cauliflower.

20170525_224029

You are going to want to cook the cauliflower to your liking, I cooked mine for about 9-10 minutes. Obviously if you use rice here instead of cauliflower you’ll want to just make sure the rice is heated through. Now let’s add in the saffron mixture!

20170525_224142

Once that mixture is added just stir everything together, making sure it’s well combined!  Salt and pepper to taste and after that….YOU’RE DONE!  Wasn’t that super easy?! Just put it in your favorite serving dish and take it to the table!

20170525_224759

Saffron really is such a fun and aromatic spice to use, it adds such a beautiful golden color to almost anything you put it in.  It has a subtle and beautiful floral flavor, I just know you’re going to love it!

Ok, now that you have a kick ass “rice” dish head over to our Facebook page (@isbutteracarbblog) and check out our recent “Happy Fall Y’all” post and leave soon feedback!  As always if you make this dish let me know in the comments how it turned out!  Help us reach more lovely folks such as yourself by sharing the recipes and other content!  Until next time, Ciao!

Banana Cream Pie Ice Cream!

I know, I know, I’m a little behind on posts, but it’s just been so busy around here! Lots of weddings going on, engagement parties, dinner parties, birthday parties…. You name a party and I bet I’ve been to it in the last month or so!  In fact, I’m supposed to be going to my friend Chelseas today for a pool party, I know, be jealous.  However, I wanted to take some time and check on and post this recipe!

I posted a poll type thing on our Facebook page (@isbutteracarbblog) to see which ice cream recipe people wanted the most and (not surprisingly) this is the winner!  Hopefully We can do more things like this in the future and possibly some giveaways and things like that as well!

So with that being said let’s jump in to this delicious ice cream recipe!

Ingredients:

1 1/4 cup heavy cream

1 3/4 cup whole milk

1 1/2 Tablespoons cornstarch

2 Tablespoons corn syrup

3/4 cup brown sugar

2 egg yolks

1 1/2 teaspoons pure vanilla extract

1/2 teaspoon salt

2 cups of bananas, mashed


Instructions: 

Grab yourself a saucepan and add in your milk, 2 egg yolks, heavy cream, corn syrup, cornstarch, brown sugar, and salt.

20170809_002036

Now that you have all that in the saucepan, whisk it up! Whisk it up real good!  I’m not joking, WHISK! Well, whisk until everything is well combined and make sure you don’t have any lumps of cornstarch floatin’ around.

20170809_002301

Put your pan on the stove on medium to medium-high heat. While that concoction is heating up, let’s mash-up those nanners (bananas)! I think I ended up using about 4 medium bananas for mine, but as long as you have 2 cups of mashed bananas you’re good to go!

20170809_002433
Just use a fork to mash these suckers up!

Stir your mixture on the stove frequently.  Continue whisking it until it reaches a boil. Once it reaches a boil take it off the heat and pass it through a sieve or strainer.  We are doing this just incase some of the egg yolk got cooked and we don’t want little chunks of egg in our ice cream.

20170809_003323

Let’s add that vanilla extract and those mashed bananas to the mixture!

20170809_003538

Make sure you mix those bananas in really well.

Let the mixture cool down for about 15 mins, then put it in an airtight container and pop it in the refrigerator.

20170809_003851

You’re going to want to let this hang out in the fridge for about 10 hours.  We really want to give those flavors time to meld together and thoroughly chill.  Plus, if it isn’t chilled well, it won’t freeze well.

Ok, 10 hours is up!  Now let’s add our ice cream to our ice cream maker.  You’ll need to follow your ice cream makers manufacturers instructions on times and things like that, because they all vary and I haven’t a clue as to what type you’re using. My Kitchen Aid mixer usually takes about 20 minutes.

20170809_125426

So churn away until it looks something like this….

20170809_131358

All that’s left to do now is scrape all that ice cream goodness into an airtight container and put it in the freezer for 4-6 hours.  If you’re impatient like me you can always eat a little bit straight out of the mixer…. it’s like soft serve.

After that 4-6 hours though your going to have a beautifully decadent Banana Cream Pie Ice Cream!

20170810_234337

Man is this ice cream good! The brown sugar lends a delicious caramel flavor to it and the egg and cream give it such a rich and luscious texture. Plus there’s banana in it so that makes it healthy….. right? RIGHT?!

Anyway, I hope y’all give this ice cream a try, you won’t regret it!  Let me knew how it turns out in the comment section! Don’t forget to check out our Facebook page (@isbutteracarbblog) for polls, giveaways, Q&A’s, and whatever else I can think of!  Thanks for stopping by, until next time! Ciao!

P.S.- Speaking of parties…. Check out this deer party in my yard! 

Vadouvan Spice Blend!

Ok, I know I haven’t posted in a while but, I have a good reason…. it’s summer!  We have just been so busy with summer stuff I honestly just haven’t wanted to be inside writing. However, I’m here now and I know how excited you must be! That was total sarcasm by the way.

Anywho, in today’s post we are going to make a Vadouvan spice blend! If you haven’t heard of Vadouvan, don’t worry, I feel like most people haven’t. The good news is, now you have and you’re going to sound so gastronomically knowledgeable to all of your friends that you (in my most basic white girl voice), like literally can’t even!

More about food later, let’s talk about music festivals!  One of the reasons I haven’t been posting lately is because I’ve been paying tons of money to live like a homeless person for days at a time and loving every second of it.  We try to go to several music festivals a year, and one of my absolute favorites is ‘Electric Forest’ in Rothbury, Michigan. It’s a place that I am convinced is made of pure magic.

For those of you who haven’t had the pleasure of prancing around the woods of Rothbury, you definitely need to put this festival on your must attend list. I’ve been lucky enough to attend several festivals in the past couple years, but nothing comes close to the feel of the Forest. It ties together freedom of expression, community, art, and music that makes all types of ears happy. The excitement of the Forest is too much to contain, so the fun starts waiting in line to get your car checked in. As we slowly rolled through, we saw groups of people gathered together playing hacky sack, dancing on/in/out of cars, drinking beer, all waiting for their friends to join them to set up camp together. This year we had a really great group of people, Michael, Emily, Ivy, John, and Dean (the Forest virgin), and myself!

Setting up camp is where the true feel of the Forest comes to life. Neighbors introduce themselves to one another, offering to help put tents up, or to join their camp later on. A sense of community is well established from the start. Our neighbors this year were an outstanding group of people from Michigan (shout out to Zack and Ashley).

Walking through the Forest requires taking a moment to observe the people around you. Some festivals have become a little more homogeneous in the sense of what attendees wear. At times you feel like you are seeing the same person over and over again: fluffies, kandi, pasties, neon. It’s so refreshing to see the pure creativity and the variety of self-expression in the forest. Every person, totem, and even car was dressed to impress and express themselves freely. The single best thing you can do at the Forest is to just LET GO. Don’t go in with a strict schedule, planning to catch every artist playing. There are just too many places to explore and discoveries to be made for you to have your time ruined because you didn’t see “(insert random artist here).” As one of the Forest Stewardesses would say, “Leave your worries behind, pack up an open mind, and get ready for a magical flight through the Forest.”

On the path to daytime discovery, you can catch a variety of art displays and installations that are set up throughout Sherwood Forest. One of the crowd pleasers this year was the saloon-like shacks that held grassroots performances, coffee ground readings, trading posts, all created with serious attention to detail and authenticity. Along the wooden boards of the shacks you could find old newspapers, antique telephones, pillows, small wagons, all giving that genuine old-time feel. And if you look closely enough, you might find a secret passageway like we did. A circular doorway led into a room that was straight out of the prohibition era, secreting away scandalous gambling, unbridled dancing and good ol’ fashioned debauchery.

IMG_20170701_215449_458

Then, the magic hour begins. The sun dips lower, sunlight slowly fading from the trees, replaced by lasers energetically dancing off the leaves. The art you saw during the day takes on new life in the evening glow. The random saloons are filled with actors and bands inviting you to come right back in. The energy of the Forest turns from a gentle calm to a frenetic pulse, its waves filling your body and giving you new inspiration to dance. It is truly amazing how much the venue changes with just the rise and fall of the sun.

After dancing your heart out, there really isn’t a better place to cool off and relax than in a hammock. Trust me, I tested this theory several times just to make sure (The sacrifices I make for you guys, I know). The communal culture of sharing your hammock is remarkable. A couple of friends were savvy enough to bring their own hammocks, my others friends not so much. Did that matter? Not really. If you weren’t in the know that a hammock was the single most important thing to bring to the Forest, you weren’t left standing on the sidelines watching others sway their cares away. Most people would leave their hammocks out for other people to use while they left in search of food, drinks, or other shenanigans. Once the owners returned to find their own version of a hippie Goldilocks sleeping in their hammock, they’d either let them stay there or just kindly inform them that they were back. It was a beautiful sight to see, and the generosity and communal attitude really added to the magical feel of the Forest.

Which brings me into the main reason people love the Forest so damn much… For many people, festivals are mostly about the music. I mean, why else would you go to the trouble and the cost, right? But after hopping from festival to festival, I’ve realized that music isn’t the only driving force that creates a truly amazing festival experience. It’s the people. During my five days of dancing through the Forest, I continuously saw random acts of kindness wherever I went. I saw a basshead dance/run so hard her phone flew out of her bag. As soon as it hit the floor a fellow Forester picked it up and ran after her to make sure she got it. Random exchanges of goods could be observed on the campsites, by the bathrooms, and by the great Giving Tree. Oh yes, the Giving Tree: a place where people leave items behind, and sometimes take something else in return…small things like gum, toilet paper, cigarette, charms, kandi, pins, and whatever else they think will help a person out or warm someone’s heart. Generosity extended beyond the Giving Tree, though. If someone didn’t look like they were “all there,” people would stop and make sure they were doing all right instead of stepping over them and carrying on. The random acts of kindness are what keep people coming back to Electric Forest. After you have been to the Electric Forest, you realize why people keep coming back to it year after year. It’s a judgment-free zone, filled with positive vibes, amazing natural and artistic visual experiences, and a great sense of community that is the perfect venue for great music. Hopefully I’ll  see y’all there next year!

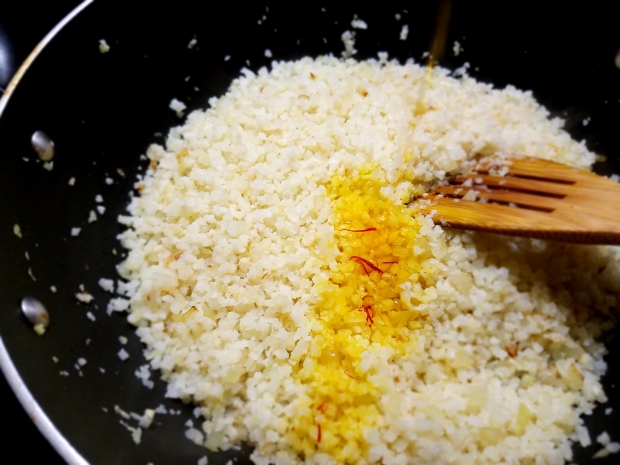
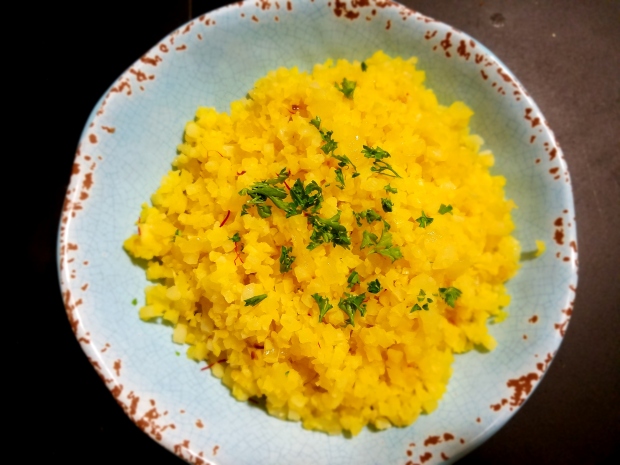
Ok, enough of that…. let’s talk food!  Vadouvan… what the hell is it?  Well, it’s a blend of Indian curry and French flavors….a French derivative of Masala (spice mixture used in Indian cooking).

In my opinion it’s a great gateway to Indian food.  So let’s get to it!

Ingredients:

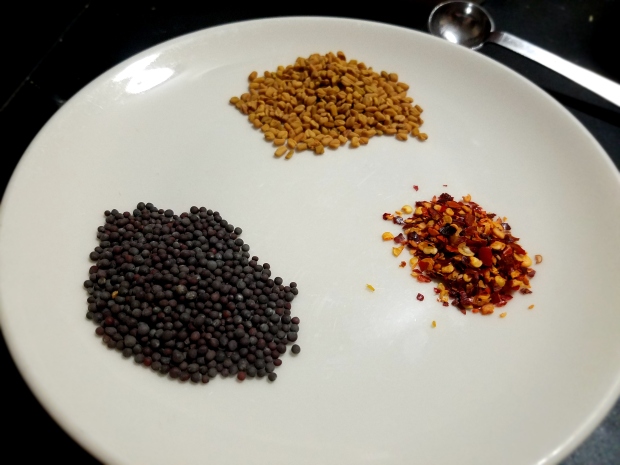
1 teaspoon fenugreek seeds

1 teaspoon garlic powder

1 teaspoon onion powder

1 tablespoon ground cumin

1 teaspoon ground cardamom

1 teaspoon brown mustard seeds

3/4 teaspoon turmeric

1/2 teaspoon grated nutmeg

1/2 teaspoon hot red-pepper flakes

1/4 teaspoon ground cloves


Instructions:

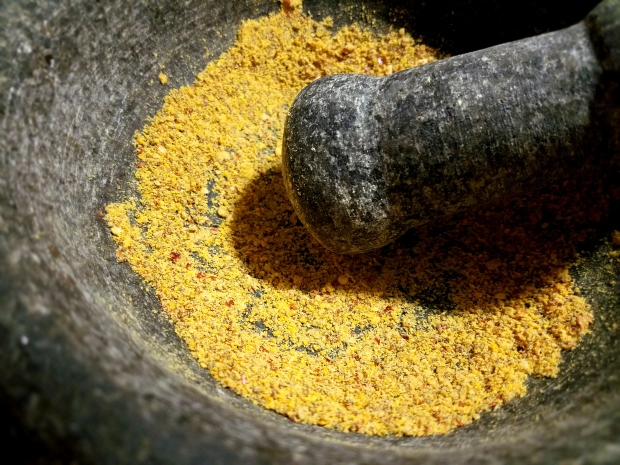
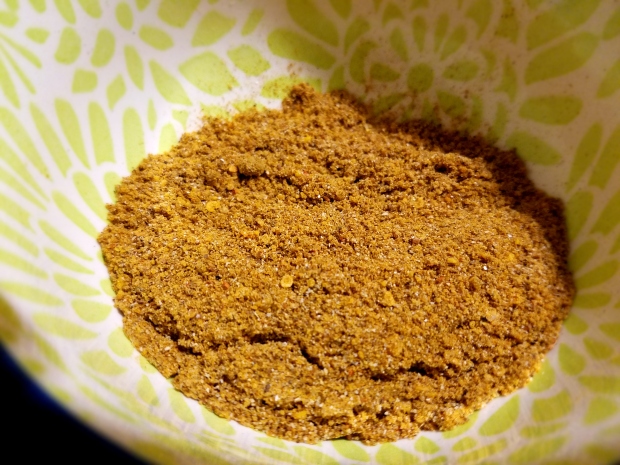
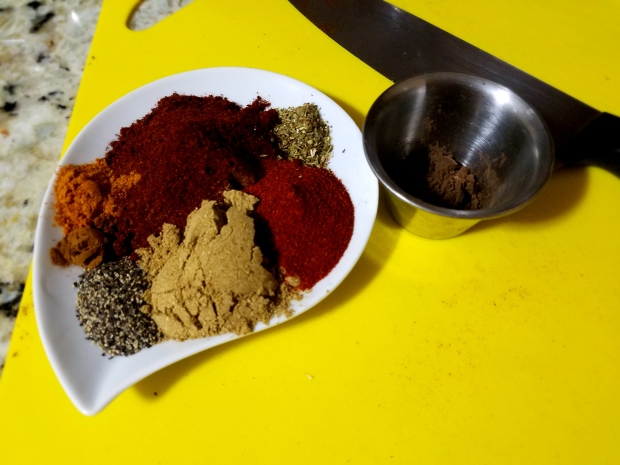
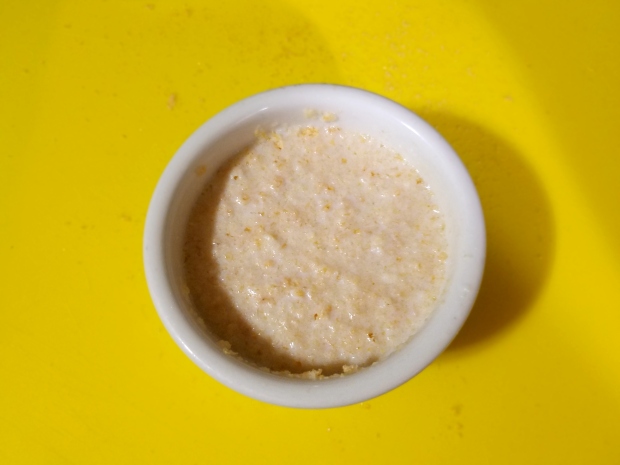
Gather all of your ingredients and a mortar and pestle or spice/coffee grinder. Take your Fenugreek seeds, mustard seeds, and red-pepper flakes, add them to the mortar and pestle and grind them into a powder like consistency.

20170525_193021

They should look like this when you’re done.

20170525_193457

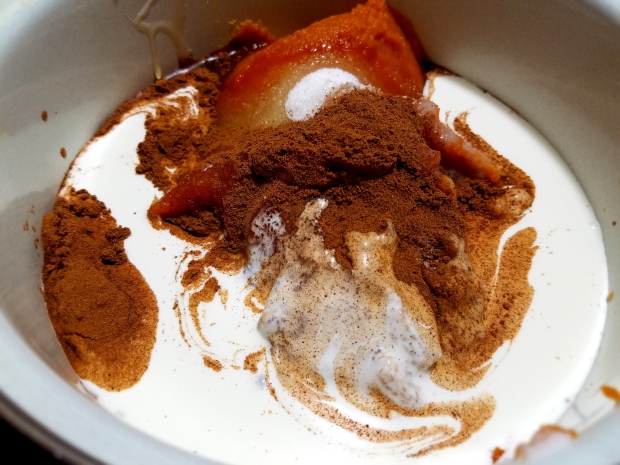
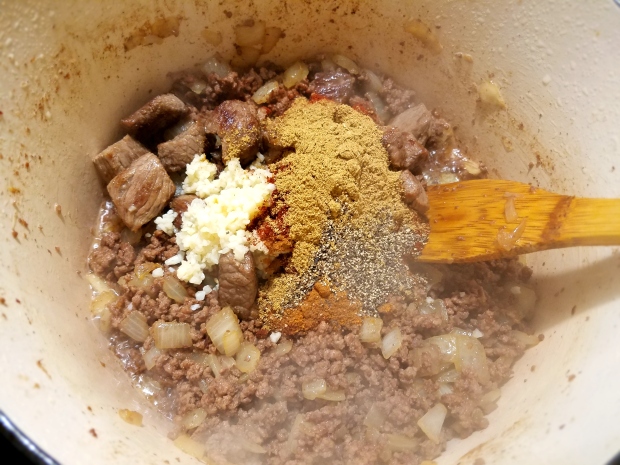
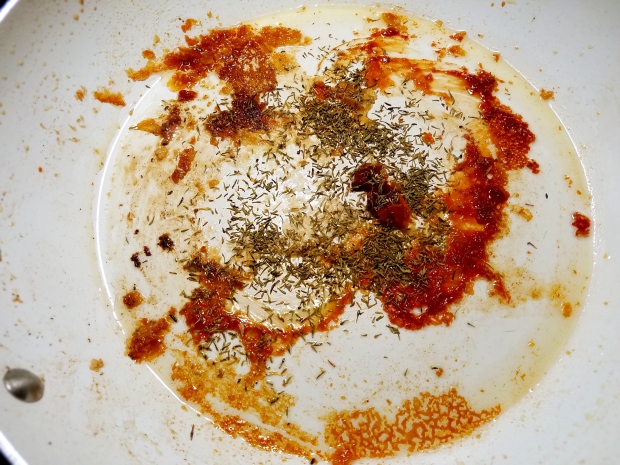
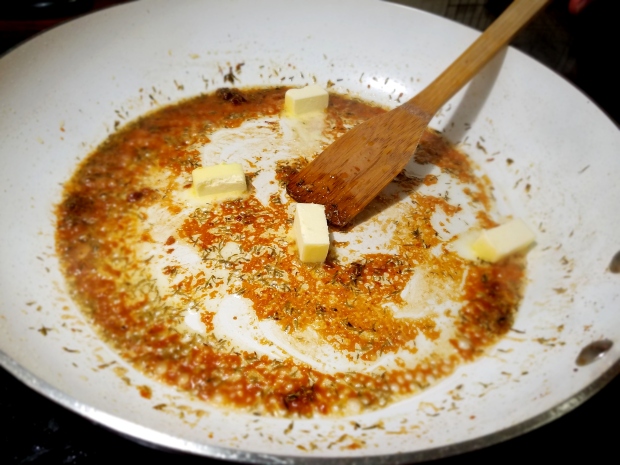
Now for the hard part…. get all the other spices together and add them to the party and mix them thoroughly!

20170525_194003

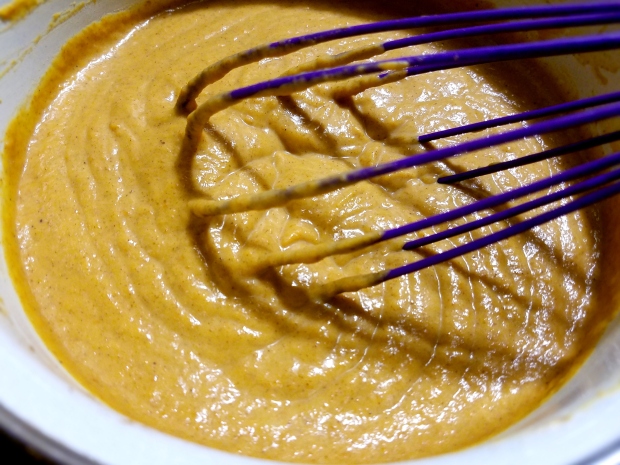
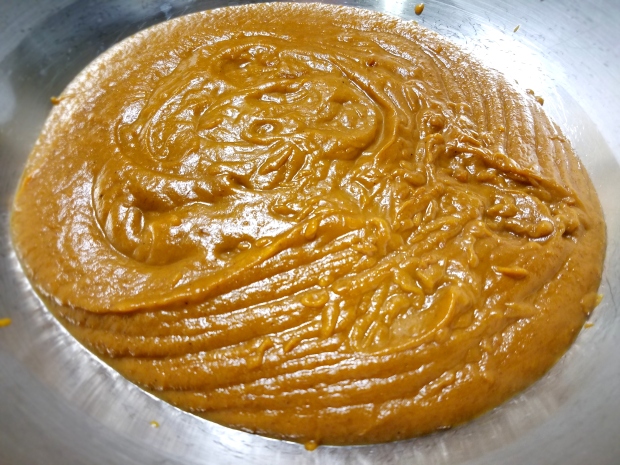
Once those are mixed in well…. boom!  You got yourself one hell of a spice mix!

20170525_194258

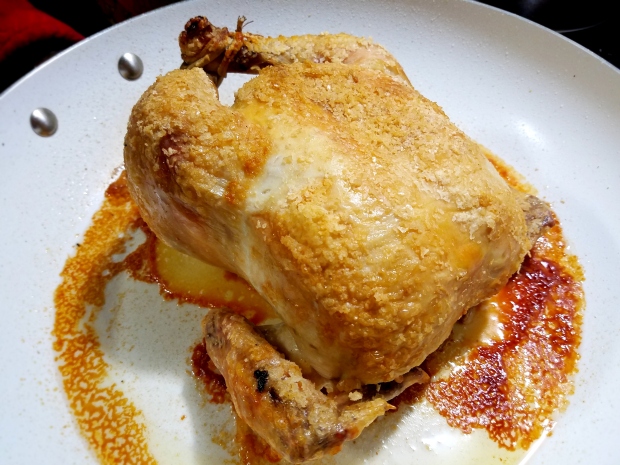
This is such a fragrant and complex mix of spices.  Just be sure to store it in an airtight container until you’re ready to make Vadouvan Chicken Curry (Maybe i should do a recipe for that, huh?). Feel free to try it on/in things….experiment with it!

Thanks for stopping by and keep an eye out on our Facebook page (www.facebook.com/isbutteracarbblog or just search @isbutteracarbblog) for polls, contests, and randomness that doesn’t make its way here…. it’s a whole different party over there sometimes! Also, give this mix a try and let me know what you think of it in the comments! Let me hear about some of your festival tips and stories in the comments as well! I hope y’all come back soon and until next time, Avoir!

Mama’s Italian Meatballs!

Hello again, friends! I hope everyone enjoyed their extended holiday weekend, we certainly did! Tikki got a surprise visit from his Nana & Poppa, it completely made his day. He always gets so excited when people visit, especially when Nana & Poppa visit.

Anyway, let’s talk about meatballs, since that’s what we’re making today.  When I make meatballs (and all Italian food really) it floods my mind with memories of my grandmother cooking and her teaching me how to cook. It also brings up memories of her cussing me out in Sicilian for tasting the food too often, I mean can you blame me? That shit was delicious!

She was, and still is, such an inspiration to me.  So, this post is for her. Let’s get rolling….

Ingredients: 

1 lb ground pork

1 lb ground beef

1/2 cup of milk (low carbers, you can use beef stock here instead of milk if you’d like)

1/3 cup of bread crumbs (if you are eating low carb replace these with finely crushed pork rinds)

4 cloves garlic

1 medium onion, diced

2 eggs

2 Tablespoons of olive oil

2 teaspoons of salt

1/2 cup fresh parsley, chopped

2 Tablespoons parmesan cheese, grated

1 teaspoon dried Italian herb seasoning

1 teaspoon black pepper

1/4 teaspoon cayenne pepper

Instructions: 

First preheat your oven to 425°F. Then mix your breadcrumbs (or pork rinds for you low carbers, I got you fam) with the milk and set aside.

20170225_203829
I know it might look a little gross, but this little concoction is going to help keep these meatballs super moist and delicious! 

Let that just hang out and it will eventually turn into a paste like consistency. Time to sauté your diced onion with the 2 Tablespoons of olive oil, we don’t really want to get much color on these onions, just a lite sauté. I cooked mine a tad too long, mainly because I got caught up watching ‘Roseanne’, don’t you dare judge me! Once they are done, take them off the heat and let them cool down a bit.

Now let’s get a big mixing bowl and add the pork and beef to the bowl.

20170225_210100

Mix the beef and pork together until it’s just combined, don’t get wild.  Add the onion and breadcrumb mixture to the meat. 20170225_210951

Beat your eggs well and add them, along with everything else, to the party.

20170225_211753.jpg

Mix all those delicious ingredients together thoroughly, again, don’t get wild.  We don’t want to overmix these suckers, cuz nobody likes a tough ass meatball.

Cover the mixture with plastic wrap and let it hang out in the refrigerator for about an hour.  We want to give the mixture some time to chill and firm up a bit before we handle it anymore.

20170225_212039.jpg

Now that our hour of chill time has passed and we’ve all had a glass or three of wine, let’s get our mixture out of the refrigerator. I like to use a small ice cream type scoop to get the initial shape of the meatball, plus it helps keep the size of the meatballs fairly consistent.  Then I roll or shape the meatballs by hand. Pro tip, keep a small bowl of water near by to keep your hands wet, this will help to keep the mixture from sticking to your hands.

20170225_222916
You want your meatballs to be about the size of a golf ball.  

Place them on a lightly oiled sheet pan and keep a little space between them. Then pop them into your preheated 425° oven for about 20 minutes or until they look like this…

20170225_225128

Now we’re in the home stretch!  Just add these to a pot of tomato sauce (like the one I gave you a recipe for).

20170225_225456

All you have to do now is let these simmer on low for about an hour or hour and a half.  This is going to really help the meatballs get tender and super flavorful.  After that….. you’re done! Time to plate up!

20170226_001220

Man, these things are spectacular! You can put these on some pasta, make a meatball sandwich, or just top them with a little parmesan and parsley and eat them as a meal!  These also freeze extremely well, so make a huge batch and save some for later! Many people boast that their meatballs are “the best!”, I for one refuse to make such a claim (Even though my meatballs ARE indeed the best)!

I hope you give these a try for yourself and let me know how they turned out in the comments below!  Check us out on Facebook (@isbutteracarbblog) and give us a ‘like’! Don’t forget to follow the blog and tell your friends!  Until next time my friends, Ciao!

Genurken-flürken Cake! (The Golden Girls)

Happy Mothers Day to all you moms out there!  As some of you may know I’m a huge fan of “The Golden Girls” television show, so I wanted to do a dish from the show.  I may even start doing more foods from shows and movies, who knows!  Anyway, I’m sure this isn’t the true “Genurken-flürken” recipe, but it is an ancient Scandinavian cake recipe….or atleast as close as I could come to making one haha.

I believe Rose mentioned the cake in season 2 while serving it up to the other girls in the kitchen and of course Dorothy had something hilariously snide to say. While this may not be an exact replica of Rose Nylunds Genurken-flürken cake, it is still a fun and delicious cake to make. As they would say in St. Olaf, låt oss göra denna tårta!

Ingredients: 

Cake: 

6 large eggs, room temperature

1 cup almond flour

1 1/2 cups All-Purpose flour

1 cup of butter (16 tablespoons)

1 1/3 cups sugar

1/2 teaspoon salt

1 1/2 teaspoons baking powder

1/2 teaspoon almond extract

1 teaspoon vanilla extract

Glaze: 

2 cups powdered sugar

1 teaspoon vanilla extract

1/4 teaspoon almond extract

1/4 cup heavy cream

Instructions: 

Ok let’s get the oven preheated to 325°F! Then you need to grease and flour a bundt pan. To do that just liberally rub the inside of the pan with Crisco or butter, then put a little flour in there and toss it around to make sure everything is coated. Remove the excess flour from your pan.  It should look something like this.  20170421_235308.jpg

Next in a mixing bowl add your butter and beat it until it’s soft.

20170421_235611.jpg

Then add in your sugar, flavorings, baking powder, and salt.  Mix those until well incorporated.

20170422_000308.jpg

Add your all-purpose and almond flours and mix it up!  It’s going to look sorta crumbly.

20170422_001307.jpg

Now let’s add those eggs in, one at a time though.  After they are in scrape down your bowl and give it another good mix.  It should be sorta fluffy at this point.  Next let’s add the batter to the bundt pan!

20170422_002432.jpg
Try to level the top out the best you can with a spatula.  

Pop that sucker in the oven and bake until a wooden skewer comes out clean, about an hour.  The edges should also pull away from the pan a little. When it’s done take it out of the oven and put it on a rack to cool for about 15 minutes.

20170422_012827.jpg

After the 15 minutes is up, flip it out of the pan and let it completely cool.

20170422_014220.jpg

While its cooling let’s make our glaze! It’s extremely easy, just put all your glaze ingredients into a mixing bowl and mix thoroughly to combined.  I usually just keep dipping my whisk in and drizzling the glaze over the cake. Just make sure the cake has concretely cooled before you glaze it.  Let the glaze set and firm up on the cake for about 5 minutes, then you’re ready to serve!

20170422_025901.jpg

One of the best things about this cake it that it will last covered for a week or you can freeze it for up to 3 months!

20170422_025310.jpg

I don’t usually blow my own vertügen-flügen, but this cake turned out amazing! This Americanized version of a traditional Scandinavian recipe that Rose Nylund brought into the 80’s is just fabulous to say the least.  The vanilla and almond flavors compliment each other extremely well.  Plus you could easily serve 20 people with this cake.

I hope you give this recipe a try. Don’t forget to look us upon Facebook (@isbutteracarbblog) and be sure to comment and let me know how it turned out!  Send me pictures of your finished cakes!  As always if you have any questions I’d be more than happy to answer them, if I can. Hope to hear from you guys soon and thanks for being a friend! Ciao!

Kosher Salt-Roasted Chicken!

One of the things I love most about food is that you can take a very minimalistic approach to things, with just a few simple ingredients you can make something incredibly impressive.  I think we tend to season food so much that we miss out on the beautiful flavor of the ingredient we are preparing.  That’s what I really love about this chicken, it’s only two ingredients, chicken and salt.  I’m going to give you a thyme butter sauce recipe to go with it, but this simple roast chicken is delicious all by itself.

Let’s get started on this super simple and delicious chicken that tastes like, chicken!

Ingredients: 

1 whole chicken (about 4 pounds)

Kosher salt (I can’t really give you an amount here)

For The Sauce: 

1 lemon, juiced

2 Tablespoons of cold butter, cut into 8 pieces

1 Tablespoon Thyme leaves

1/3 cup of chicken stock

Salt & Pepper to taste

Instructions: 

Get your chicken out of the refrigerator and set it on the counter about an hour before you plan to start cooking. Preheat your oven to 450°. Next, get some paper towels and dry your bird off really well.  Moisture on the outside = no crispy bird for you.

20170410_234905.jpg
Also, tuck the wing tips up and under the front of the bird.  I like to do this so they don’t get burnt. I didn’t take a picture of this because I’m trying to save some money on production, or I forgot. 

Ok, now that our bird is dried off and our wing tips are tucked, let’s talk about this chickens butt! I always just snip it off.  A very prestigious university did an authentic and scientific study on chicken butts, the study showed that if you clip that part off, the chicken tastes better.  That could be something I completely made up, but that’s what I’m going with.  Either way just clip that little bugger off.

20170410_235013.jpg

After you have clipped that off for no apparent reason, it’s time to salt our chicken. I urge you to use kosher salt here, however regular table salt will work.  Just make sure you salt the chicken liberally and don’t forget the cavity (inside) and bottom of the bird, they need a liberal coating as well. Next, we need to tie the legs together.  Some folks may feel the need to truss the chicken, but I don’t think all that work is necessary, plus I’m pretty lazy.

20170410_235613

Next, we need to place the bird in our roasting vessel! Use a pan that you can also use on top of the stove, so we can make the sauce after the chicken is done.  Salt the breasts of the chicken one last time.  Also, don’t get nervous and start thinking ‘I’m using too much salt’ you’re not, stay calm.  20170411_000049

Take a paper towel (or something) and try to get any salt that has fallen off the bird out of your roasting pan. We’re going to be using that pan to make our sauce and we don’t want the sauce to be WAY too salty, like some people I know.  Place the chicken in the preheated oven for about 55 minutes (or until a thermometer in the thigh reads 160°).  After that 55 minutes is up you should have something that looks like this….

20170411_010508.jpg

You should have a nice golden brown and very crispy bird.  Remove the chicken from the pan and let it rest for about 10 minutes.  Meanwhile, let’s start the sauce! Go back to the pan and remove most, not all, but most of the rendered chicken fat from the pan.

20170411_010858.jpg

Turn your heat to medium high and add in the Thyme leaves.  Let those cook for about 20 seconds, stirring.

20170411_010957.jpg

Next, add in your lemon juice and chicken stock. Stir all that around and simultaneously begin scraping all that beautiful fond (delicious little brown bits stuck to the bottom of the pan) off the pan. Let that cook for about 2 minutes, just to let it reduce a little.  Now, turn your heat to low and add in some of your butter.

20170411_011347.jpg

It’s really important here that when you add the butter in you really need to stir and sorta keep your pan moving. After that butter is melted and incorporated, add in the juices off the plate where the chicken has been resting.  Add in the rest of your butter and keep stirrin’ and movin’, stirrin’ and movin’ until all the butter is melted and incorporated.  The thickness or consistency of the sauce is completely up to you, if you want it a little thicker reduce it more, a little thinner add a little more stock.  Taste for seasoning, I added a little pepper. Mix that in and once it is thoroughly mixed, turn off the heat and your sauce is done!

20170411_011744.jpg

Now just plate up your beautiful roast chicken and decorate the plate/platter a little if you’re feeling fancy.

20170411_012433.jpg

All that’s left to do now is enjoy one of the most moist and delicious roast chickens you have ever had! This chicken accompanied with that thyme butter sauce is going to blow you away and seriously impress any and all guests you have over for dinner.

Anyway, I seriously hope you try this recipe out for yourself, it’s so simple and fairly inexpensive.  Let me know how it turns out in the comments!  Don’t forget to follow the blog so you get notified first when something is posted, that makes you a V.I.P. don’t cha know. Also, find me on Facebook @isbutteracarbblog and follow me there as well! Thanks for stopping by! Ciao!

Watermelon Agua Fresca!

With Cinco de Mayo and summer right around the corner I thought I’d share a delicious and refreshing drink recipe! I love making this drink for our dinner parties in the spring and summer, plus you can add a little vodka to really get the good times rolling! I’m going to be telling you about two recipes by the way, one for the Agua Fresca and one for simple syrup.

One of the great things about this recipe is that you can use just about any fruit that your little heart desires.  I just really prefer the watermelon, it’s just so invigorating on a balmy day! Anyway, let’s get to it!

Ingredients for the Agua Fresca:

1/2 of a seedless watermelon (about 6 cups)

2 cups cold water

Simple syrup to taste

Ingredients for the Simple Syrup: 

1/2 cup of water

1/2 cup of sugar

Instructions: 

First we need to make our simple syrup and despite what the name says, it really isn’t that hard.  You can make any amount you want, by simply using a 1 to 1 ratio. Just dump your 1/2 cup of sugar and 1/2 cup of water into a little sauce pan over low heat and give it a stir.

20170426_212151
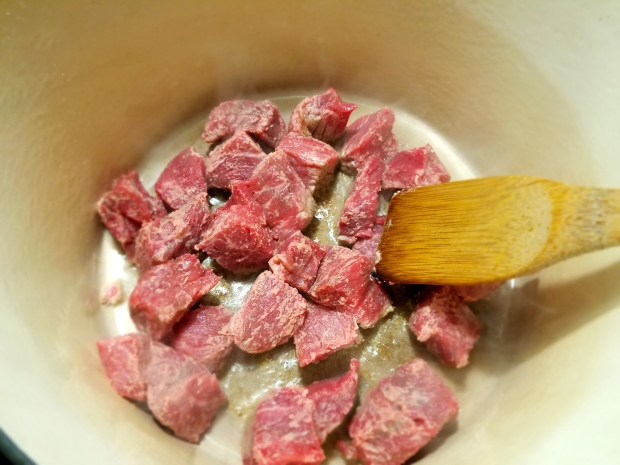
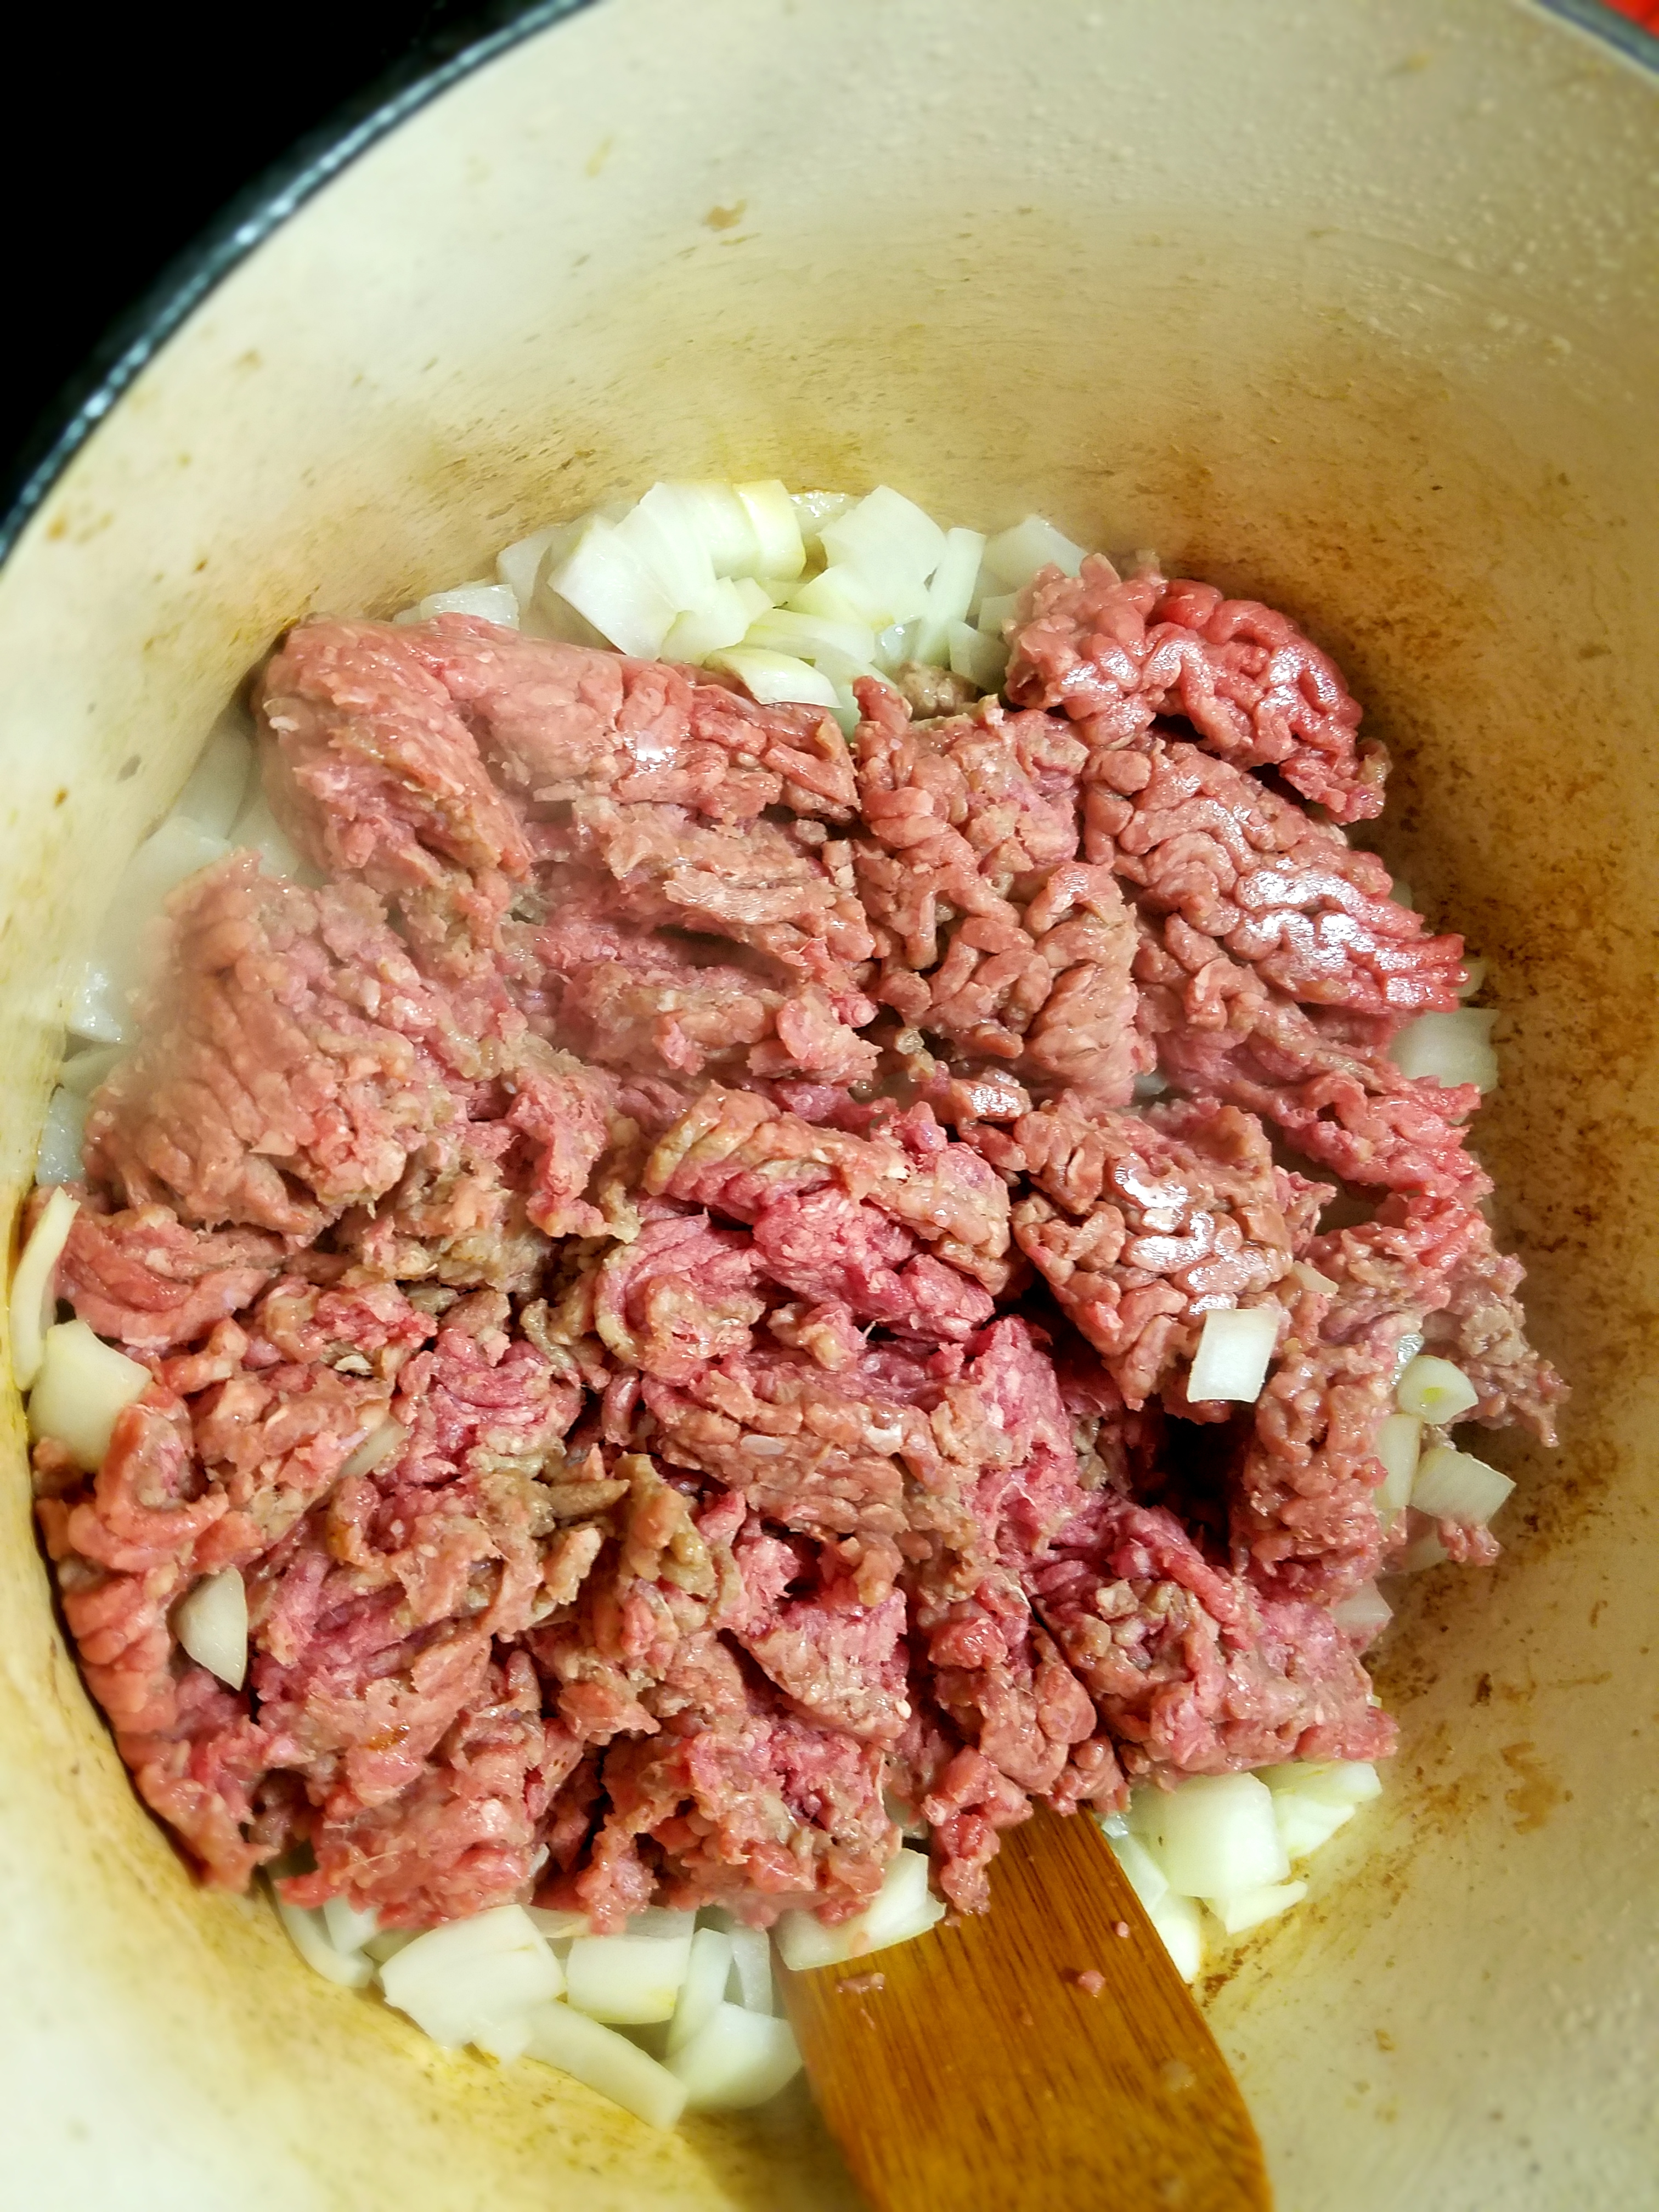
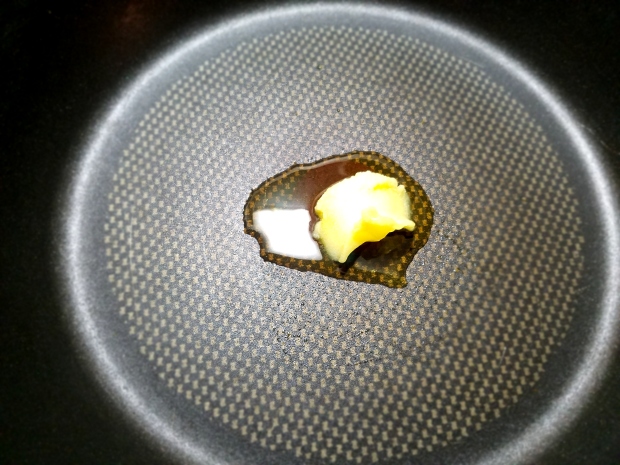
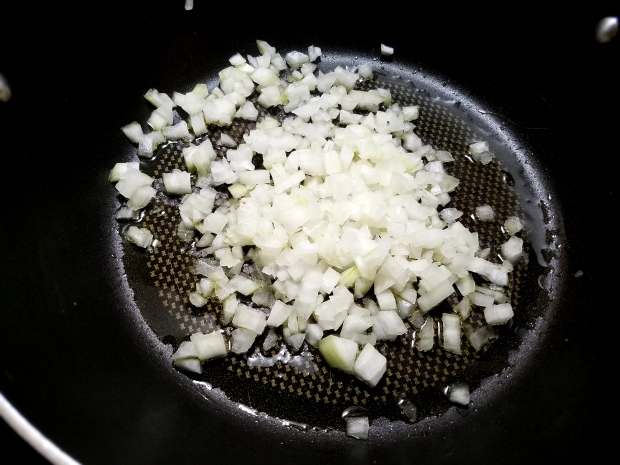
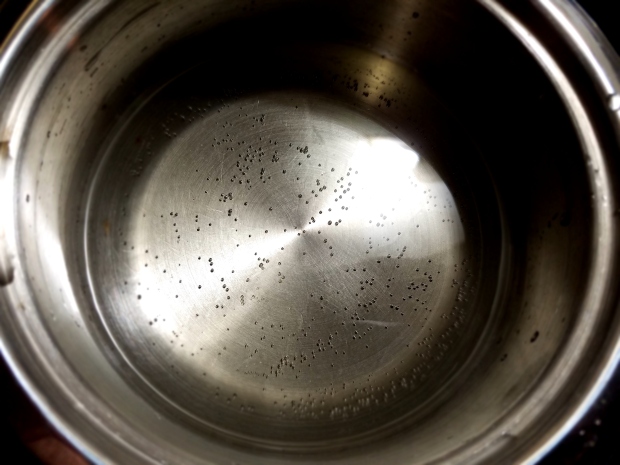
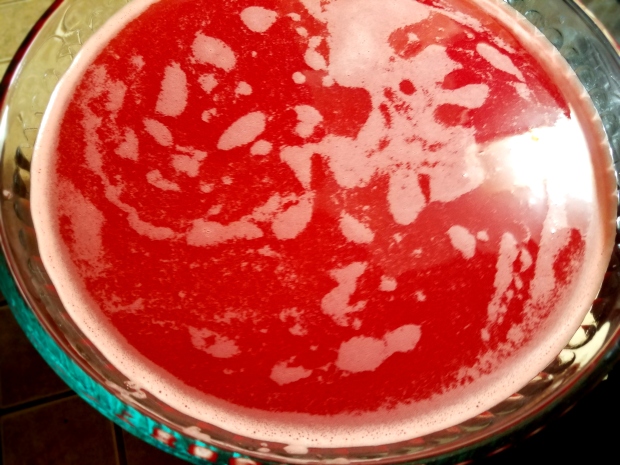
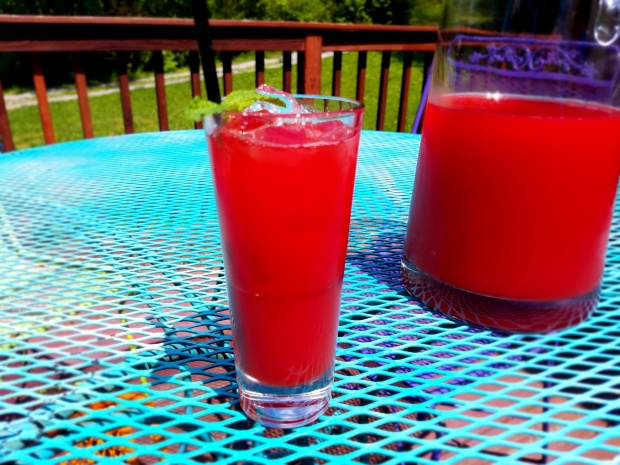
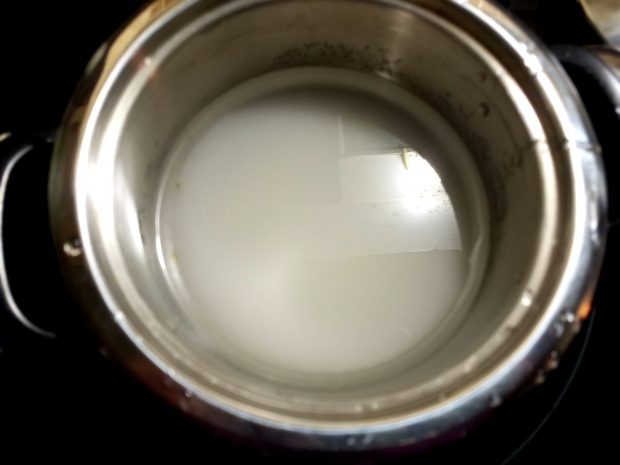
You’re just going to let that hang out and stir it every so often, until it becomes completely clear!

20170426_213124.jpg

Now, once it looks like the picture above, remove it from the heat and let it cool to room temperature. After it cools down it’s ready to use!

On to the Agua Fresca! Get your seedless watermelon and cut it in half.  Take a little taste to see how sweet it is, so you’ll know about how much simple syrup to add later.  At least that’s what you should tell people if you get caught eating the watermelon, I mean it sounds like a legitimate excuse, right?

20170426_212321.jpg

Next scoop out 6 cups of the watermelon flesh and put it in your blender, along with the 2 cups of water.  Don’t get any of the white parts of the melon (rind), it’s super bitter and isn’t very tasty.  Well, unless you pickle it, but that’s a whole other story.

20170426_212854.jpg

Place a towel over your blender(you don’t want watermelon juice all over your damn kitchen) and then pulse it a few times. Slowly increase the speed on your blender until you get to max speed. Let that blend for a minute or two, until you’re satisfied that it is thoroughly blended.

20170426_214053

Now pour the freshly blended melon through a fine mesh strainer to get all the fibrous bits out.

20170426_214500.jpg

Just take a spatula and scrape it around the mesh strainer.  This will take a little bit of time, not a long time, don’t worry.  When you’re done it should look close to this.  Just discard all the fibrous materials.  Now, you should have something that looks like this! 20170426_214949.jpg

You may want to skim some of the foam off the top (I did), however it isn’t necessary and it completely optional.  Have a taste and see how much of the simple syrup to add, I added about 2 Tablespoons to mine.  I can’t give you exact measurements here because all watermelons are different, you may have a sweeter one. So, the amount of simple syrup you use is completely up to you.  Next just pop it in the refrigerator and let it get cold, then it’s ready to serve!

20170428_142721.jpg

I really hope you try this drink recipe out!  It is just the perfect beverage for your Cinco de Mayo celebration or just a random Tuesday.  It’s wonderful mixed with vodka or just by itself.  Pine thing is for sure, your guests will surely be impressed!

So, give this one a try, let me know how it turns out in the comments. Don’t forget to follow the blog and check us out on Facebook (@isbutteracarbblog). Thanks for stopping by! Adiós!